SplitFlap Gateway
The gateway is the ESP32 controller that sits between your network and the split-flap bus. It owns everything about the hardware — discovering modules, provisioning, calibration, diagnostics, and driving the flaps — and serves a single-page web UI to do all of it. It has no notion of "a weather app" or "a playlist"; that's the Companion's job.
Repo: github.com/avandeputte/SplitFlapGateway · board: Waveshare ESP32-S3-RS485-CAN (RS-485 transceiver on board) · reach it at http://splitflap-gw-xxxxxx.local (six hex digits unique to the board — printed at boot) — or by IP, see below
1. Flash it
Two ways:
- Prebuilt binary (no toolchain): download from the repo's Releases. On a blank board,
flash
firmware.factory.binat address0x0— either with the browser tool at espressif.github.io/esptool-js oresptool --chip esp32s3 write_flash 0x0 firmware.factory.bin. If it won't program, hold BOOT, tap RESET, release BOOT, and retry. (Use a USB-C data cable.) - Build from source: VS Code + PlatformIO, open the folder with
platformio.ini, Build → Upload. PlatformIO fetches the ESP32 toolchain and libraries automatically.
The first flash must be over USB. Every update after that can be done over WiFi (OTA)
from the Settings tab — upload the app-only firmware.bin (never the factory image).
2. Join it to WiFi
The gateway ships with no WiFi credentials, so it can't be on your network yet. It solves that itself: whenever it is not connected as a station, it raises its own fallback access point — on first boot, and again any time it later loses your WiFi.
- From a phone or laptop, join the WiFi network
Split-Flap-GW— password12345678. (It's an open-to-anyone-nearby setup AP, which is why it goes away as soon as the gateway is on your LAN.) - Browse to http://192.168.4.1 — the gateway's full web UI, served by the AP itself.
- Settings → WiFi: enter your network's SSID and password, then Save WiFi.
- The gateway reboots, joins your LAN, and the setup AP shuts off — so your phone drops back to your normal WiFi. Reconnect your phone/laptop to your own network and carry on there.
2.4 GHz only. The ESP32 has no 5 GHz radio. If your router publishes one SSID for both bands, it's usually fine — but if the gateway can't see your network, that's the first thing to check.
Finding it on your network
Once it's on your LAN, the gateway advertises itself over mDNS as
http://splitflap-gw-xxxxxx.local, where is six hex digits unique to this
board — the name is printed in the boot log, and it's the same name your router's device
list shows. (Firmware before 3.11 used plain splitflap-gw, which collides the moment a
second gateway joins the LAN.) That's the easy address — but mDNS is a best-effort
convenience, not a guarantee. It commonly doesn't resolve when:
- your client is on a different VLAN / subnet from the gateway (mDNS doesn't route), or the network has an isolated IoT/guest SSID;
- the router or AP blocks multicast / "client isolation" is on (common on mesh systems);
- you're on Windows, on a Docker container or a VM, or on a corporate VPN — none
of which reliably resolve
.local; - a Home Assistant container is doing the lookup (this is why the companion's
gateway_urlis often happier with an IP).
If the .local name doesn't load, use the IP address instead. To find it:
- From the gateway itself — while still on the setup AP, the Status tab shows the IP it got. Or watch the USB serial console at boot (115200 baud); it prints the IP.
- From your router — open its admin page and look at the DHCP client / "attached
devices" list for a host named
splitflap-gw-xxxxxx. This is the most reliable route, and while you're there it's worth giving the gateway a DHCP reservation so the address never changes. - By scanning —
dns-sd -B _http._tcp(macOS) lists everysplitflap-gw-*on the network; orarp -a, ornmap -sn 192.168.1.0/24on your subnet.
Then use http://<that-ip> everywhere this guide shows a .local gateway address —
including the companion's GATEWAY_URL / gateway_url. A reserved IP is the setup least
likely to surprise you later.
3. Set the grid
In Settings → Display Layout, set rows × columns to match your wall (e.g. 3 × 15). This drives the live display and the calibration picker — and the Companion reads it from here, so you set the grid once, on the gateway.
The web UI, tab by tab
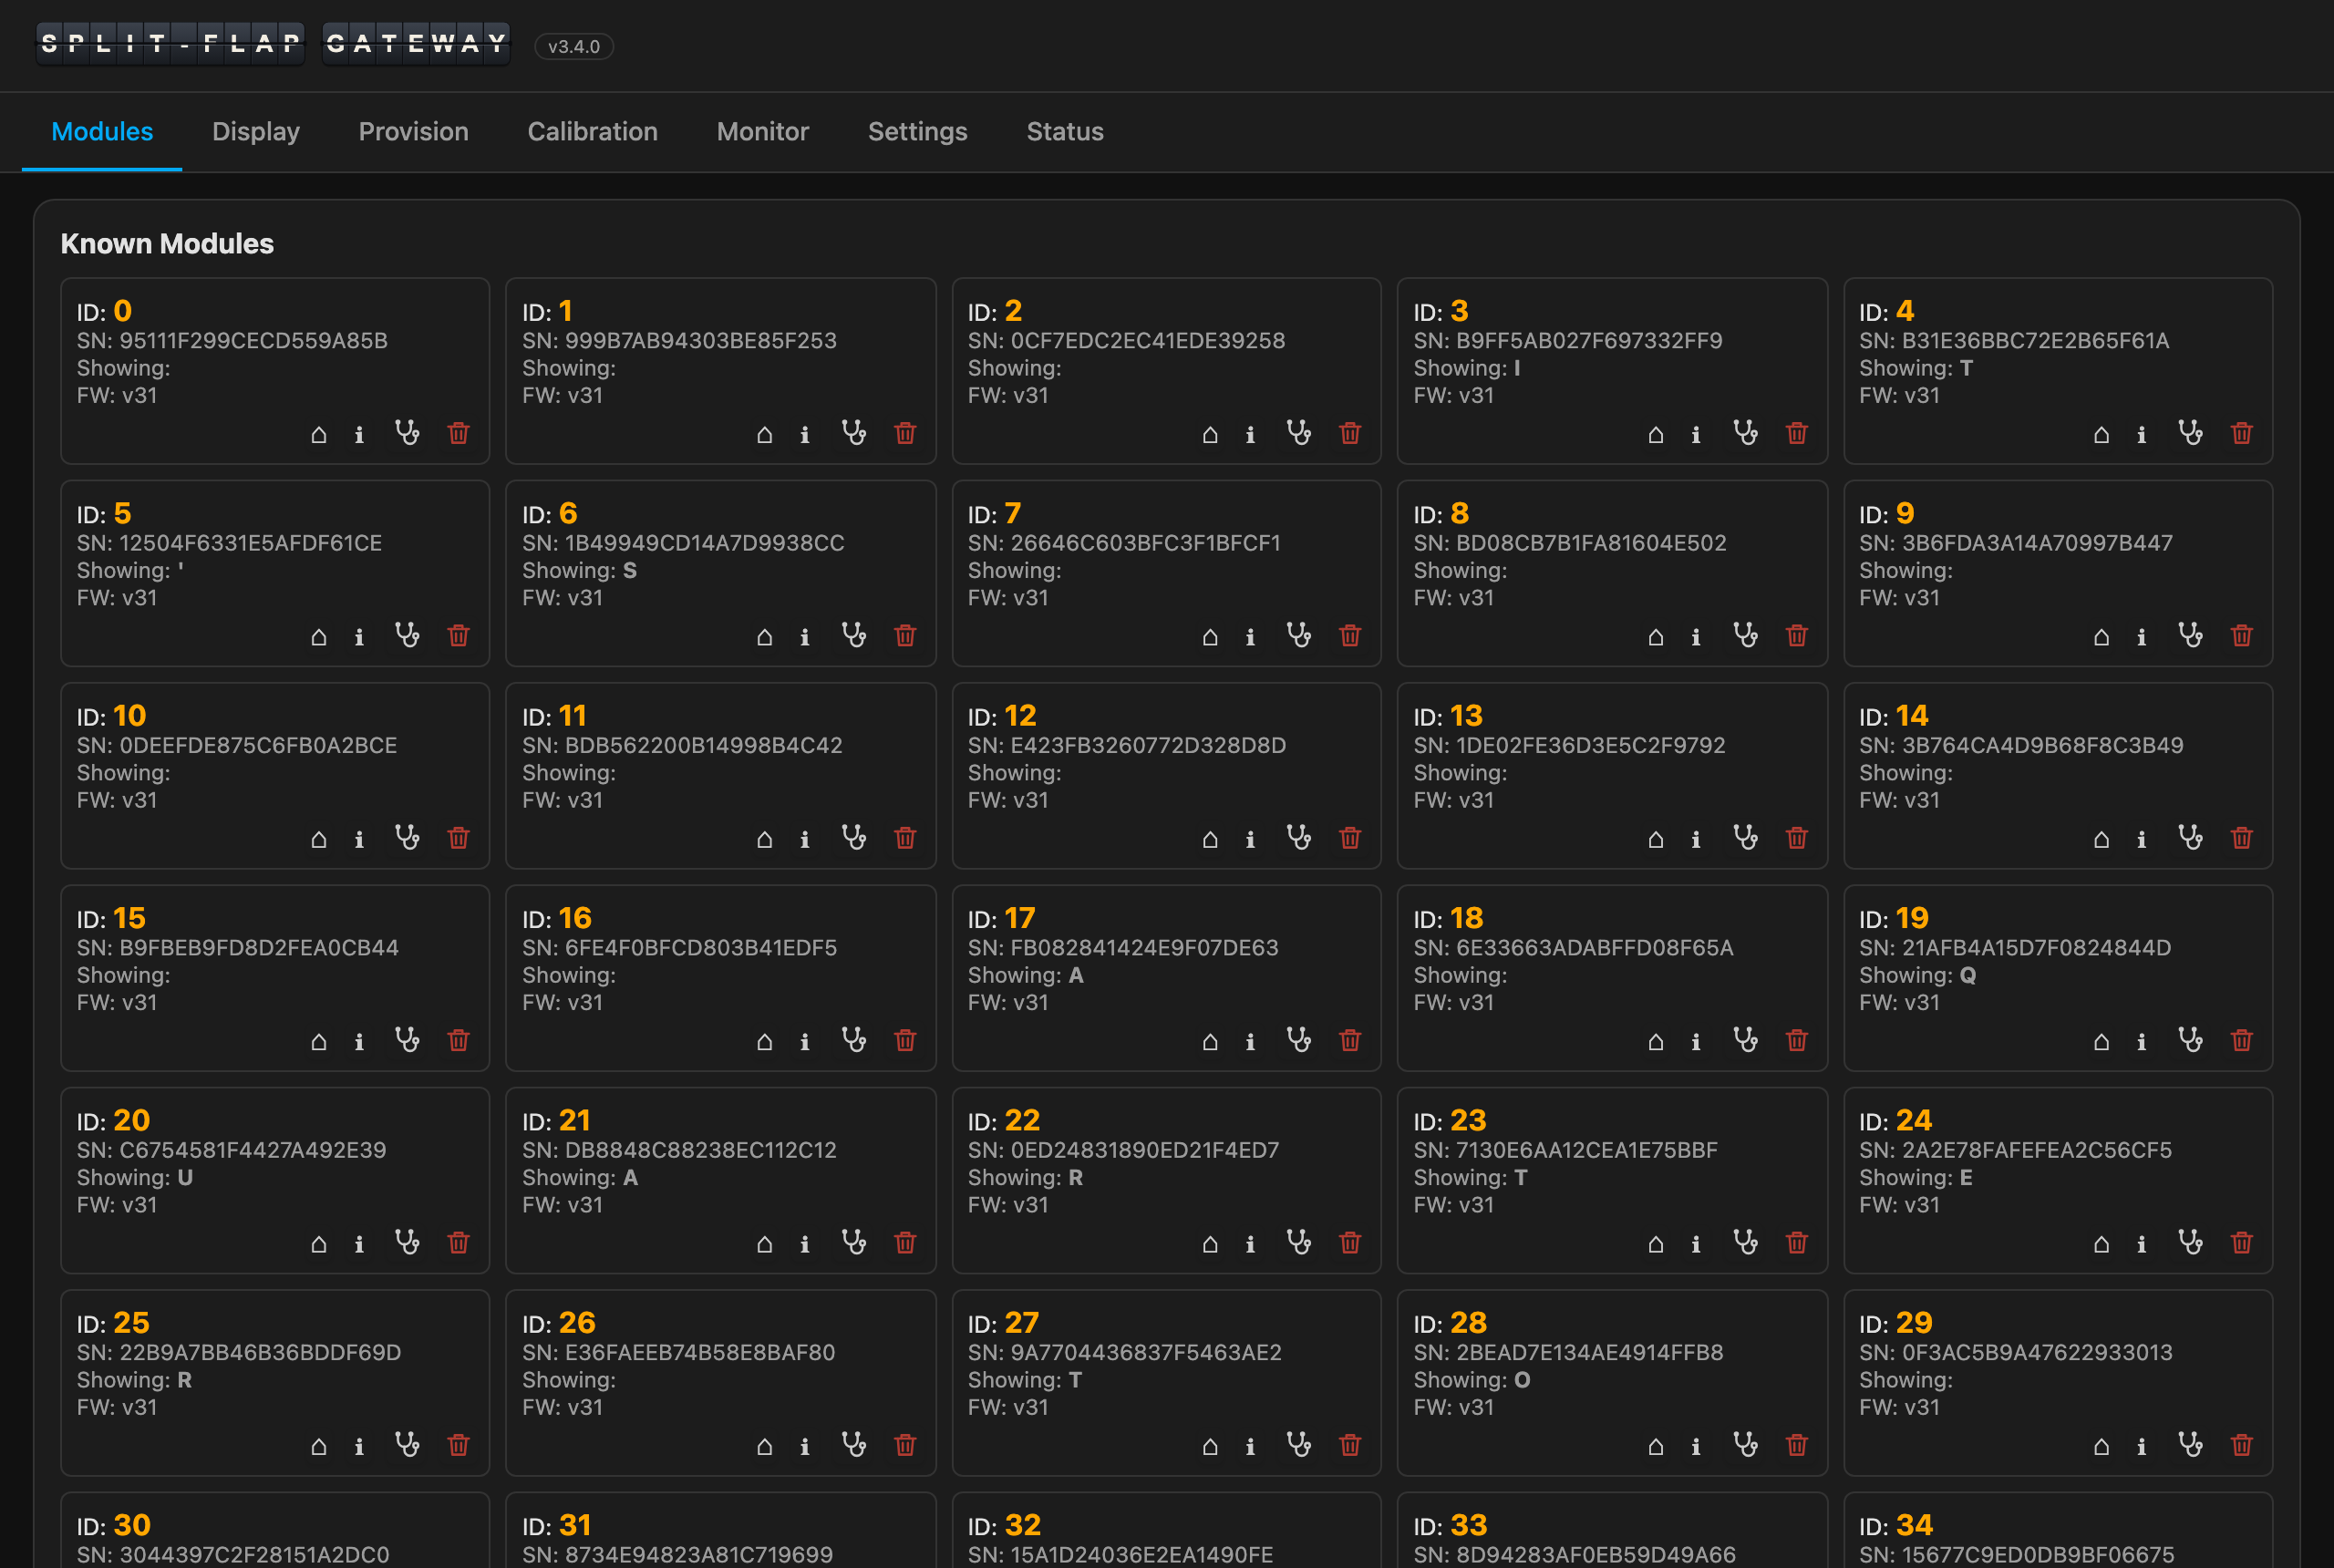
- Modules — a grid of every known module: ID, serial, the character it's showing, and firmware version. The list is sticky — it survives reboots and only drops a module after 6 hours unseen. Each card has ⌂ Home, ℹ Info (live query + the module's stored home offset, steps/rev, flap map — editable on newer module firmware), and a 🗑 menu (erase EEPROM / factory reset / de-provision). ↻ Identify All rediscovers the bus.
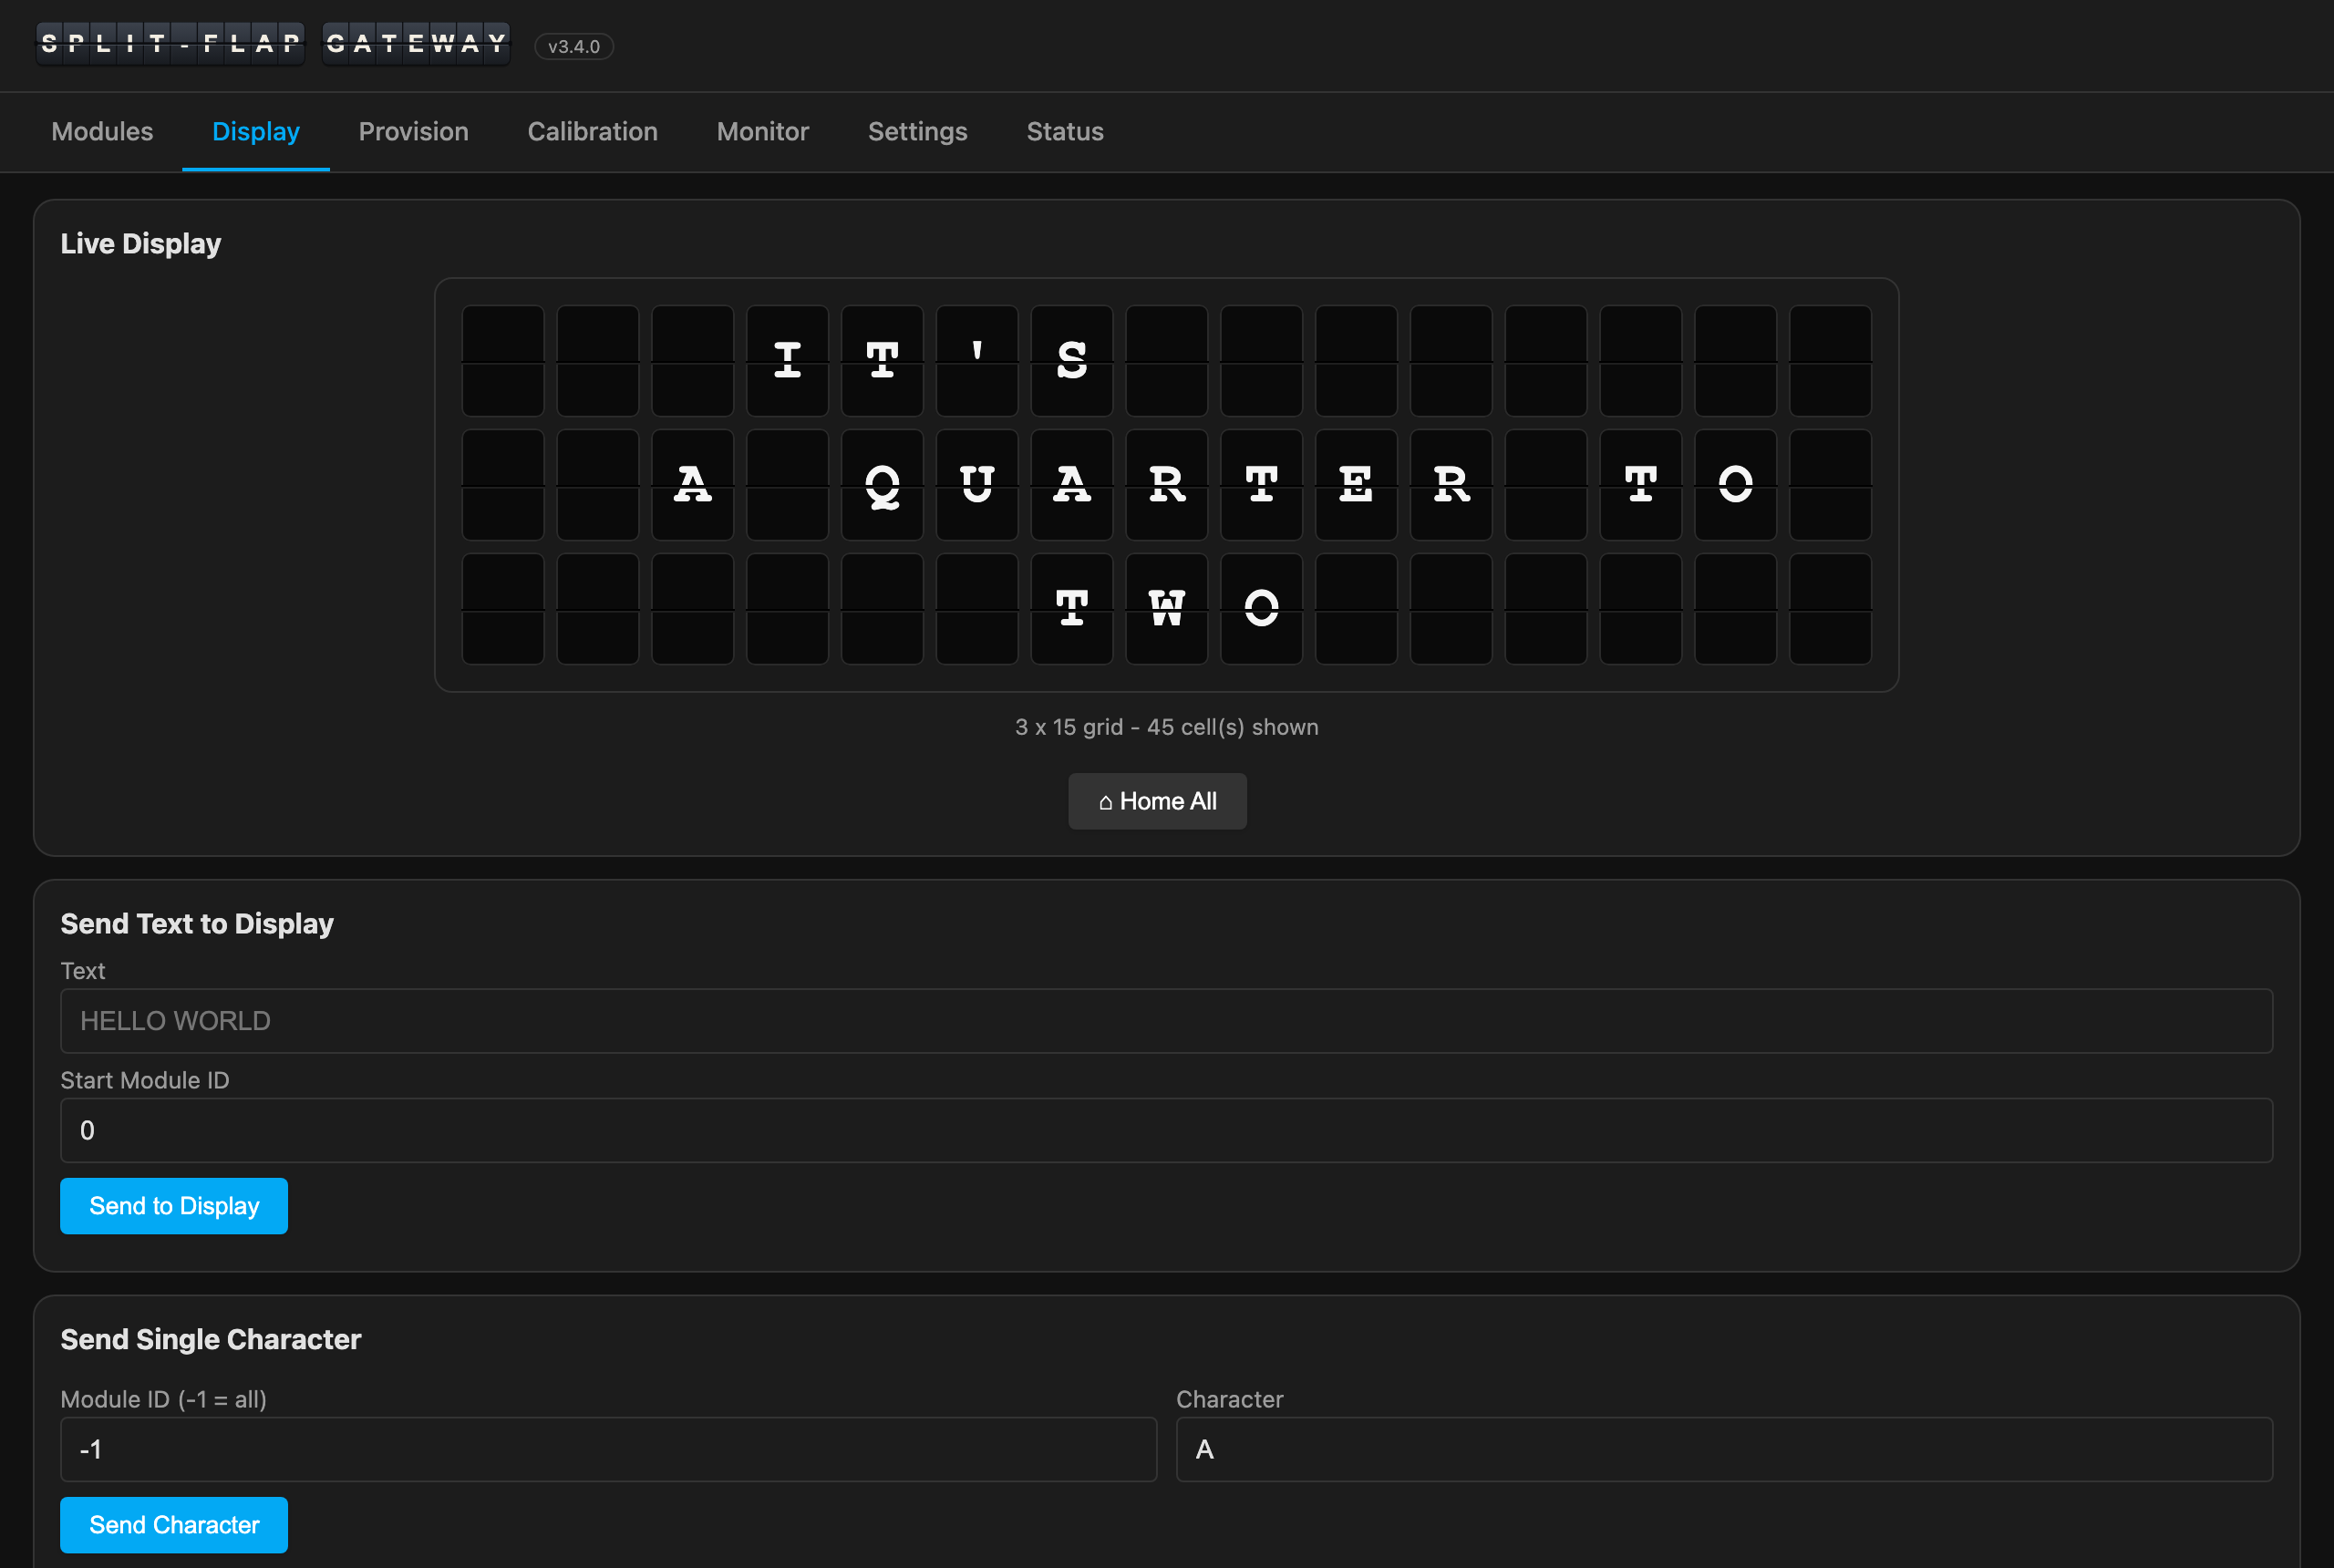
- Display — a live render of the wall, a Home All button, and boxes to send text across the modules, a single character (to one module or broadcast), or a specific flap by index.
- Provision (full guide) — discover unprovisioned modules, home one by serial to identify it physically, assign IDs, and de-provision. (This is the UI for provisioning.)
- Calibration (full guide) — a picker grid matching your layout: edit and save each module's home offset and total steps, nudge live, Count Steps, tune the per-flap map, and run a guided Calibration Wizard.
- Bus Monitor — live decoded RS-485 traffic with timestamps, pause / auto-scroll, a Download Log button, and a Send Frame box (with a Raw option) for hand-crafted commands.
- Settings — WiFi, MQTT, Timezone, Quiet Time schedule, the Companion App registration, Display Layout, Home Assistant, OTA update, and calibration backup/restore.
- Status — network, system health (uptime, heap, per-task stack), the RS-485 bus counters, the clock (RTC + NTP), and whether the companion is checked in.
What else the gateway offers
- REST API — a full JSON API, documented endpoint by endpoint in
Gateway API (machine-readable spec: the repo's
openapi.yaml). The one the companion leans on most isPOST /api/rs485/batch: a whole page of flaps in a single request, which is what keeps animations smooth with no broker involved. The raw bus frames all of it wraps are specified in Bus Protocol. - MQTT — optional; publishes bus traffic and a periodic status blob, and subscribes to
command topics. Default prefix
splitflap, port 1883. - Home Assistant discovery — opt-in on the Settings tab (needs MQTT). Creates a gateway device with a Display text entity, Maintenance/Quiet switches, and a set of diagnostic sensors. (This is the gateway's own HA device — the companion adds more; see Home Assistant.)
- OTA — update over WiFi after the first USB flash, from Settings or
http://<ip>/ota.
Updating the firmware
After the initial USB flash, all subsequent updates can be done over WiFi.
Browser upload
- Build the firmware in VS Code / PlatformIO (
pio run, or the Build button). The images land in.pio/build/esp32s3_devmodule/. (Or downloadfirmware.binfrom the Releases page.) - The file to upload is
firmware.bin— the plain application image. This is the only file to upload over OTA. - Open the gateway web UI → Settings → click Open Firmware Updater →
- Select
firmware.binand click Upload Firmware - The gateway reboots automatically on success. Confirm the new build by checking the version badge in the header (e.g. v3.5.0).
Which file? PlatformIO emits several files in
.pio/build/esp32s3_devmodule/— pick the right one:
File Use for OTA? What it is firmware.bin✅ Yes The application image — what the OTA updater writes to the app partition firmware.factory.bin❌ No Full-flash image (bootloader + partitions + app) for a bare-board USB flash at offset 0x0 — not an OTA image bootloader.bin❌ No Bootloader; USB flash only partitions.bin❌ No Partition table; USB flash only firmware.elf/firmware.map❌ No Debug symbols / linker map — not firmware The common mistake is grabbing
firmware.factory.bin. For OTA you always want the plainfirmware.bin.
From the command line (espota)
An alternative to the browser upload that needs no page open. The gateway advertises over
mDNS as splitflap-gw-<6 hex digits> (printed at boot; dns-sd -B _arduino._tcp lists it):
# PlatformIO: the esp32s3_ota environment is preconfigured for it
pio run -e esp32s3_ota -t upload                       # upload_port from platformio.ini
pio run -e esp32s3_ota -t upload --upload-port 192.168.1.105
# from .pio/build/esp32s3_devmodule/
python3 -m espota -i splitflap-gw.local -f firmware.bin

# or by IP, with an OTA password set:
python3 -m espota -i 192.168.1.105 -a yourpassword -f firmware.bin
PlatformIO can also push OTA directly via its Upload action — set
upload_protocol = espotaandupload_port = splitflap-gw.localinplatformio.ini(see SETUP.md ▸ OTA).
If the web update fails: recovery without developer tools
A failed browser upload never damages the gateway: the new image is written to the inactive app slot and only made bootable once the last byte has been verified, so if the upload stops early the old firmware simply keeps running (you'll see the old version in the header, and the uptime on the Status tab keeps counting). Nothing to undo. Here are three ways to get the new firmware on anyway, none of which need PlatformIO, VS Code, or a build environment. Every release on the Releases page carries the files they use.
1. Try again after a reboot. Power-cycle the gateway, open http://<gateway-ip>/ota in a
fresh tab (close the dashboard and anything else that polls the gateway), and upload
SplitFlapGateway-<version>.bin again. Since 3.12 the browser upload is reliable; the one
case that can still fail is the first jump from a firmware older than 3.12, because it
is the running firmware that receives the image — and a freshly rebooted board gives it the
most memory to do that with.
2. Over Wi-Fi with one small Python script (no USB cable). This is the route the gateway's own build tooling uses, and it was never affected by the browser problem. You need Python 3 (python.org on Windows; already on macOS and Linux) and one file from Espressif:
- Download
espota.pyfrom https://raw.githubusercontent.com/espressif/arduino-esp32/master/tools/espota.py (right-click → Save as…) into the same folder as the downloadedSplitFlapGateway-<version>.bin. - Find the gateway's IP address on its Status tab (or use
splitflap-gw-xxxxxx.local, the name printed on the Status tab's hostname line). - In a terminal (Windows: Command Prompt or PowerShell) in that folder:
python3 espota.py -i 192.168.1.105 -p 3232 -f SplitFlapGateway-3.12.0.bin
# Windows: use  python  instead of  python3
# if you set an OTA password on the Settings tab, add:  -a yourpassword
The script prints a progress bar, the gateway verifies the image and reboots, and the header shows the new version about 15 seconds later. If it reports no response from device, a firewall on your computer is blocking the gateway's reply — allow Python through it, or use option 3.
3. Over USB, from a browser (Chrome or Edge). Nothing to install; this also works on a gateway that will not boot at all.
- Connect the gateway's USB-C port to your computer with a data cable (many USB-C cables are charge-only; if no port appears in step 3, try another cable or port).
- Put the board in download mode: press and hold BOOT, tap RESET, release BOOT.
- Open https://espressif.github.io/esptool-js/, click Connect, and choose the port named USB JTAG/serial debug unit (or USB Serial).
- Add files to flash — two files, two addresses, to keep your settings:
| File (from the release) | Flash address |
|---|---|
SplitFlapGateway-<version>.bin |
0x10000 |
boot_app0.bin |
0xE000 |
The second, tiny file tells the bootloader to start from the slot you just wrote. Without it, a board that had previously updated over the air may keep booting the other slot — the old firmware — no matter how many times you flash. Your WiFi/MQTT settings, the module list, and any stored restore backup all survive this flash.
Alternatively, flash the single SplitFlapGateway-<version>.factory.bin at
address 0x0. That is the complete image (bootloader, partition table, boot
selector and app) and is the right choice for a blank board or one that is thoroughly
confused — but it erases the WiFi and MQTT settings, so afterwards you reconnect
through the Split-Flap-GW fallback access point as on first boot. The
module list and stored backup live in a separate flash area and survive either way.
5. Click Program, wait for Leaving…, then press RESET (or unplug and replug).
Open the dashboard and check the version in the header.
Prefer a terminal over the web flasher? esptool
(pip install esptool) does the same:
esptool --chip esp32s3 write_flash 0x10000 SplitFlapGateway-3.12.0.bin 0xE000 boot_app0.bin
# or, full image (erases settings):
esptool --chip esp32s3 write_flash 0x0 SplitFlapGateway-3.12.0.factory.bin
Restore on boot
The gateway can keep a calibration backup in its own flash and replay it to every module on every boot. It exists for walls whose modules lose or corrupt their EEPROM calibration, or get swapped around: the backup is the source of truth, and every power cycle puts the wall back exactly as the backup describes.
Setting it up (Settings tab → Restore on Boot):
- Create a backup with Backup Calibration (or use one you already have — it is the same JSON file).
- Upload to Gateway. The file is checked before it is accepted: it must be a backup with at least one usable module (a serial number and a parseable dump). The card then shows how many modules it holds and when it was created. Uploading again replaces it; Delete Stored Backup removes it.
- Tick Restore calibration on every boot, set the delay after boot (default 10 s — long enough for the modules to power up and finish their own auto-home), and Save.
Run Restore Now replays the stored backup immediately, without a reboot, which is also the way to test a freshly uploaded file.
What a run does, in order:
- Waits out the delay. The bus is already locked at this point.
- Writes each module in turn. First an
mXWframe by serial number carrying the home offset, steps per revolution and (firmware v31+) the flap set — which also clears the module's flap map — then a pause for the module to finish that erase, then every map entry as its own shortm<id>w<i>:<p>frame, paced, exactly as the calibration wizard writes them. The map is deliberately not sent inside themXW: a module writes each entry to EEPROM as it parses it and cannot keep up with a long frame at line speed, so entries vanish and the module goes deaf for several seconds (measured on v31 firmware: a 434-byte frame left 20 of 42 entries). If the backup's ID for that serial differs from the one the gateway knows, the module is re-provisioned (mXI) between those two steps and given time to restart. - Verifies each module: its EEPROM is read back (
mXAby serial on firmware v25+,mXDon v15+,m<id>don older modules) and compared field by field — home offset, steps per revolution, every flap position, and the flap set when both sides have one. A module that differs or does not answer is written once more and read back again; after that the verdict stands. A re-provisioned module is given time to restart before it is asked anything. - Homes the whole wall (
m*h), so every reel re-homes against its restored calibration.
While it runs, nothing else touches the bus. Every REST endpoint that would send a
frame — display, home, calibrate, provisioning, dumps, diagnostics, raw sends and
batches, quiet-time ON — answers 503 {"error":"restore in progress"}, and MQTT
commands are dropped (the maintenance switch still works). The dashboard shows a red
border and a banner with the phase and progress, and the Settings card shows the
detail. Read-only endpoints, settings, the bus monitor, the status page and OTA keep
working, so you can watch the run, or cancel it. The gateway's own background
bus traffic (the flap-set trickle, stale-module probes, the quiet-time schedule)
pauses too.
A flap set is only restored when it is self-consistent — the character set must
be exactly flapCount long. A backup taken from a read-back that lost its tail can
carry flapCount: 64 with three characters, and restoring that would write the
truncated set into the module; such an entry restores the calibration and leaves the
module's flap set alone. The gateway now also refuses to record an inconsistent tail
from a module's A reply (it is treated as "not reported"), so new backups and
/api/capabilities never carry one.
It always finishes. Every wait is bounded: a module that never answers is
counted as not answering and the run moves on, so a missing or unplugged module
can never leave the gateway locked. When it ends, the card reports how many modules
were verified, mismatched, not answering, or skipped (an entry without a serial or
with a dump the gateway could not parse), and GET /api/restore carries the same
numbers. A restore that cannot even start — the setting is on but no usable backup is
stored — is logged and skipped without locking anything.
The backup lives in the FATFS partition (/restore.bak), written via a temp file and
rename like the module list, so an interrupted upload cannot corrupt a good copy; it
survives OTA firmware updates. The setting and delay are in NVS with the other
configuration.
The Companion tab
When you run the Companion and point it at the gateway, it registers itself: a Companion tab appears in the gateway's nav, and the companion's own nav gains the gateway's tabs — each side advertises what it has, so the navigation always matches both halves. A container companion can even store its settings on the gateway, so it stays stateless.
Next: Companion → — or, no hardware? Matrix Gateway →